Last updated on February 10th, 2022 at 07:05 am
Companies are moving to cloud-based solutions increasingly for reasons ranging from enhanced productivity and reduced cost to better security and cooperation. Since the popularity of Microsoft cloud solutions such as Azure, Dynamics 365 and Office 365 is growing, many people, notably businesses and companies, move from the Mac system to the Windows system to take the benefits of various features.
However, many users use “Outlook for Mac”, which saves all of its data in the OLM file format, such as e-mail, contacts, calendar, notes, tasks and journals. Outlook for Windows does not support data in this format. In this article, we discussed how you could import OLM files into Office 365 when migrating to Windows.
Why does a user need to import OLM files into Office 365?
Outlook for Mac’s OLM files is only accessible from Apple computer. This restricts functionality such as calendar synchronization with Office 365. Here we have mentioned some additional reasons to migrate OLM files from Outlook for Mac to Outlook for Windows.
- Outlook for Mac is missing several features, including message recall, voting button, and Ignore & Clean-Up action.
- Users of Outlook for Mac can preview attachments to mail messages only locally.
- There is no automatic folder archiving or the ability to duplicate messages in other formats, such as HTML or TXT.
- Users cannot customize the order of folders or the retention policy for folders in Outlook for Mac.
- Mac Outlook does not connect to Exchange via HTTP, which may jeopardize security.
- Mac Outlook does not support managing the Exchange Server distribution list.
What Methods Are Available to Import OLM Files into Office 365
When users import .olm files exported from their Mac Outlook into Windows Outlook, they receive the “The file .olm is not an Outlook data file (.pst)” error. It is, therefore, necessary to convert the data to PST files before migrating them to the Windows-based Outlook client. Here are some ways to import OLM files into Outlook for Microsoft 365 for Windows
# 1. Exporting Data with Exchange Server
If a Mac Outlook user uses Exchange Server, the Outlook for Windows client can access the mailbox’s contents. This is possible because the Windows client can connect to the Exchange Server via Cached Exchange Mode or Online Mode. Following that, the Export-Mailbox shell cmdlet in Microsoft Exchange PowerShell can export mailbox data to PST files.
# 2. Exporting data from a Webmail Account Using an IMAP Account.
Numerous users combine Outlook for Mac and other Webmail services. These users can convert OLM to PST files using an IMAP account before exporting to Office 365. While the specific steps vary according to the webmail service, the process is consistent.
- Ensure that IMAP is activated and configure the webmail service with Mac Outlook with an IMAP account from Outlook> Preferences> Account.
- The next step is to configure the webmail service for Outlook for Windows clients. Create a folder and copy the contents to a location where the Outlook for Windows client can access them.
- The folder’s contents will be refreshed and synchronized when you click the Send/Receive button in Outlook for Mac.
- Mac Outlook data is now accessible via the Windows client and exportable as PST files. These PST files can then be imported into mailboxes hosted by Office 365/Microsoft 365.
OLM to Office 365 Migration in 3 Easy Steps
OLM to Office 365 Migration tool is a well-designed software with a reliable algorithm that can integrate OLM into Microsoft 365 in a one-way direct mode. The process can be completed without using Outlook for Mac or the Outlook program. Users can segregate data for migration using preview features and different filter options. To import OLM into a Microsoft 365 account, follow a few simple steps.
[Steps-1] – Open OLM to Office 365 Migration utility application that you downloaded and installed.
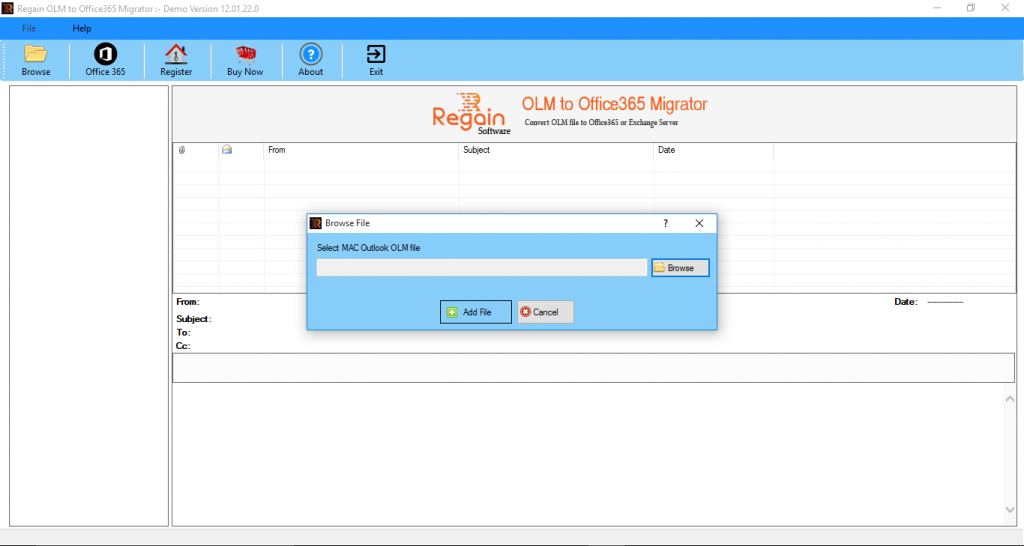
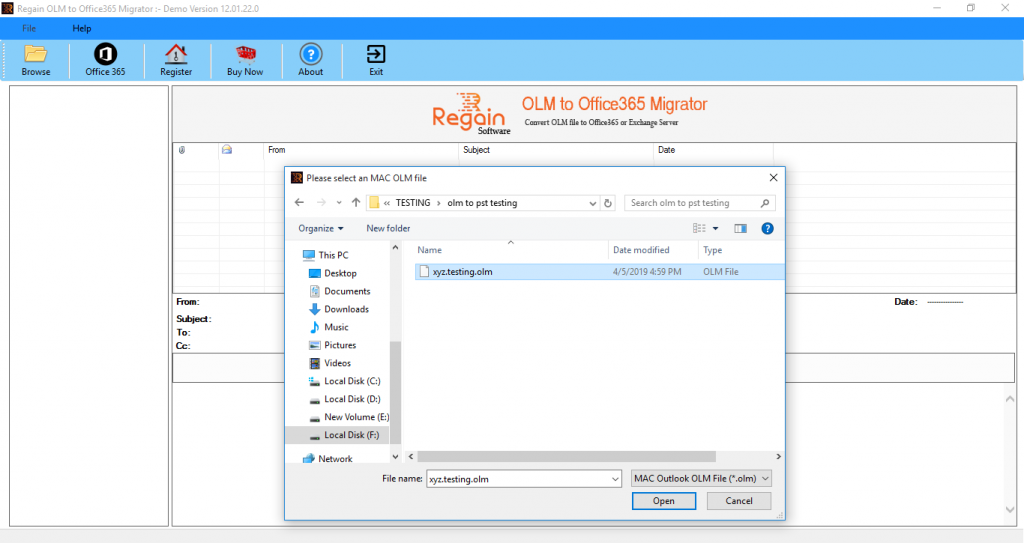
[Steps-2] – Choose the OLM file which you want to export.
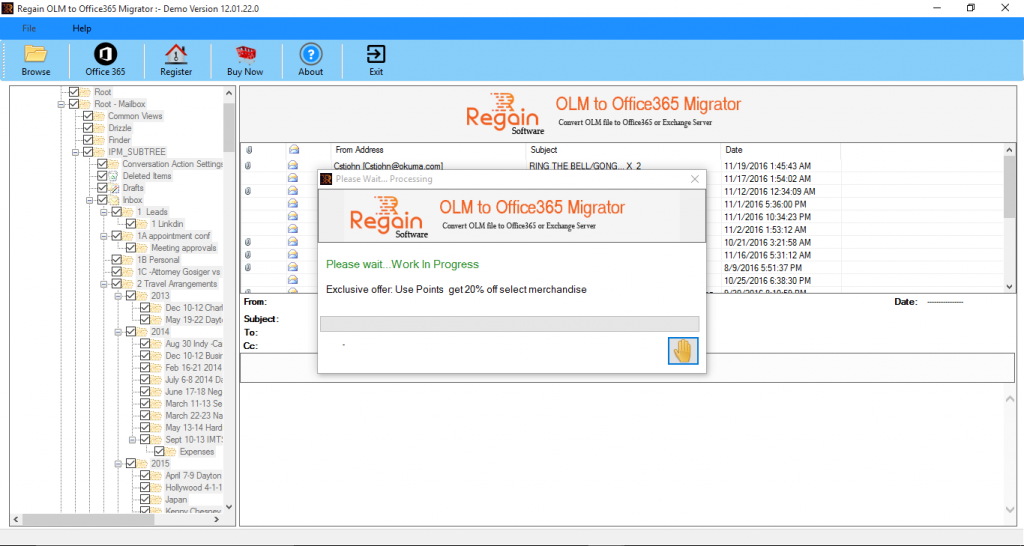
[Steps-3] – Preview entire OLM file items with details.
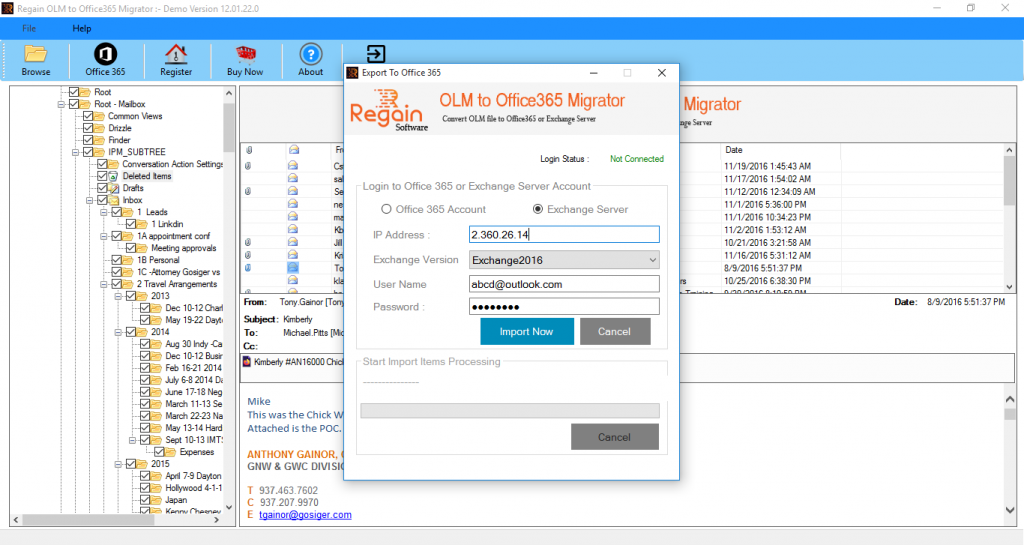
[Steps-4] – Pick your desired import options before clicking the ‘Import Now’ button. Select Office 365 as your saving option, enter your login details and click OK.
[Steps-5] – The importing process will be visible as it progresses, and your OLM data will be safely transferred into your Office 365 account.
Final Words
An alternative to the multi-staged, potentially difficult manual process of importing OLM to Microsoft 365 would be to use a highly secure OLM to Office 365 Migration tool, which can move OLM to Microsoft 365 in about 3-4 simple and direct stages.


